Extending a Standard Report in Business Central
In Business Central, extending a standard report allows us to add custom fields, incorporate additional logic, and enhance report functionality without modifying the base application. In this blog, I will walk you through how I extended the Production Order Statistics report to include additional fields and apply a date filter.
Step 1: Creating the Report Extension
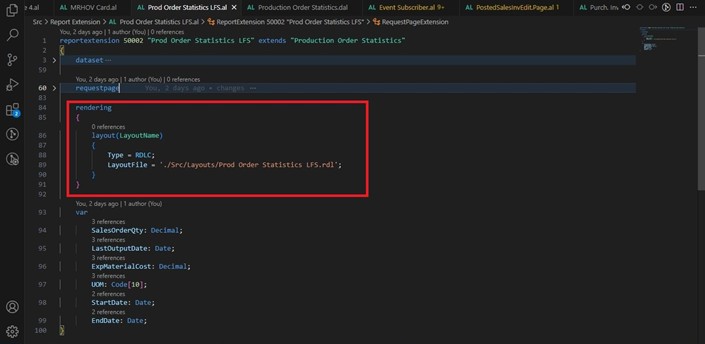
We begin by extending the standard Production Order Statistics report using the treportext snippet. In our case, we name the layout file Prod Order Statistics LFS.rdl, as shown in the image.
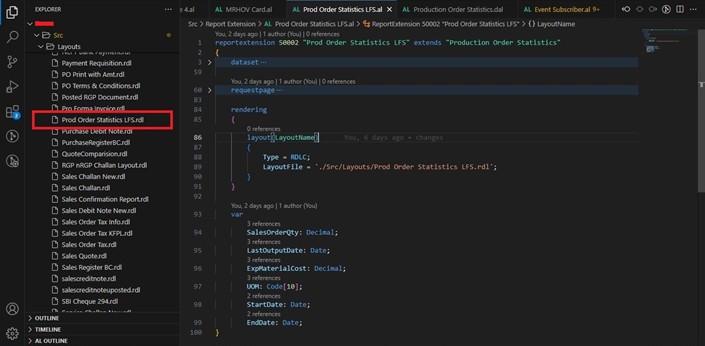
 Next, we build the package by pressing Ctrl + Shift + B. This action generates the layout file (Prod Order Statistics LFS.rdl). If we open this file at this stage, it will be blank.
 Step 2: Verifying the Layout in Business Central
After a successful build, we can verify the new layout in Business Central.
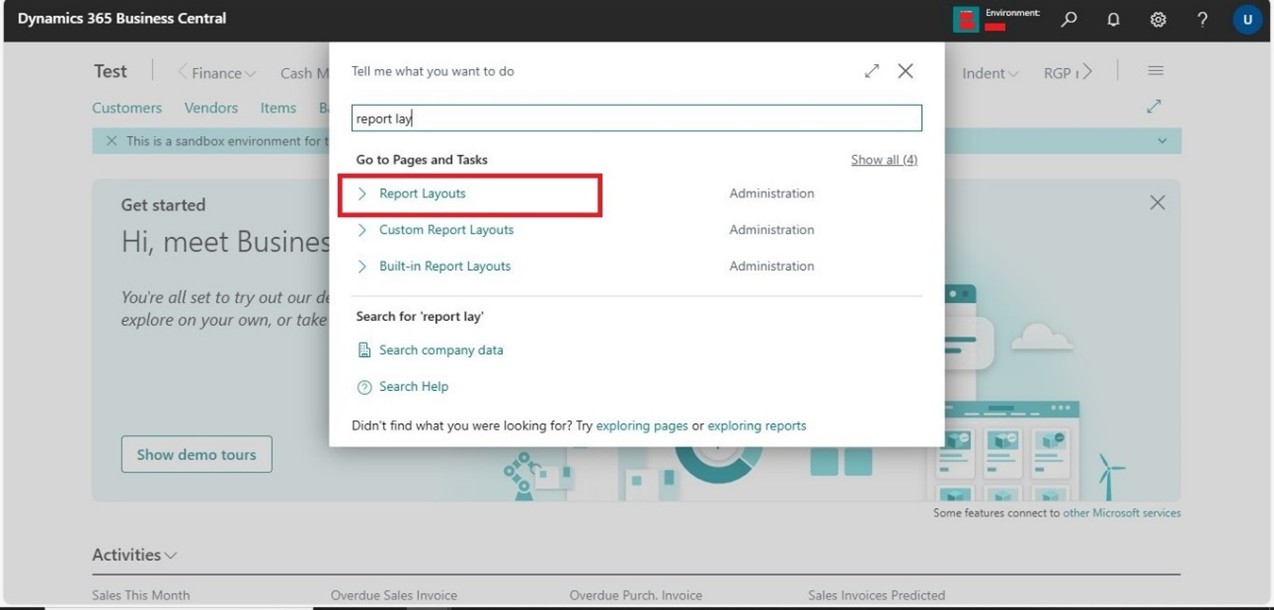
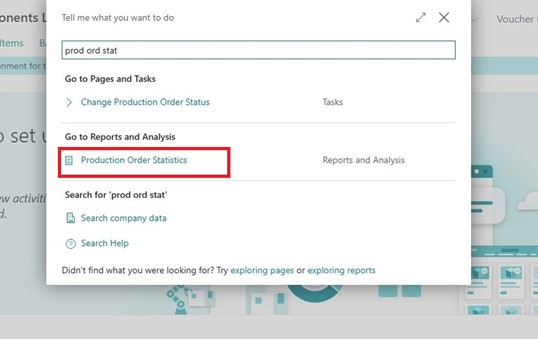
Navigate to the Search tab and type "Report Layout".
 Using the report ID, you will see both the standard layout and the customized layout.
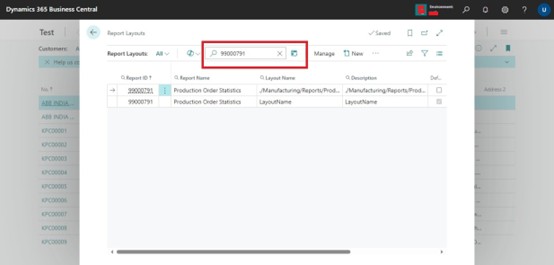
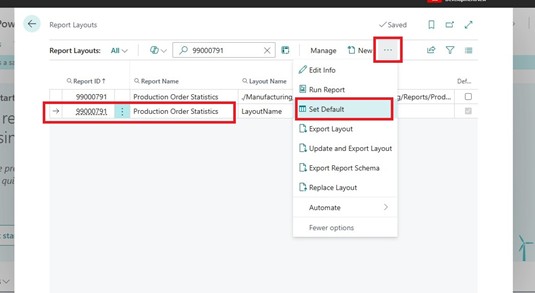
Select the customized layout (Prod Order Statistics) and set it as the default.
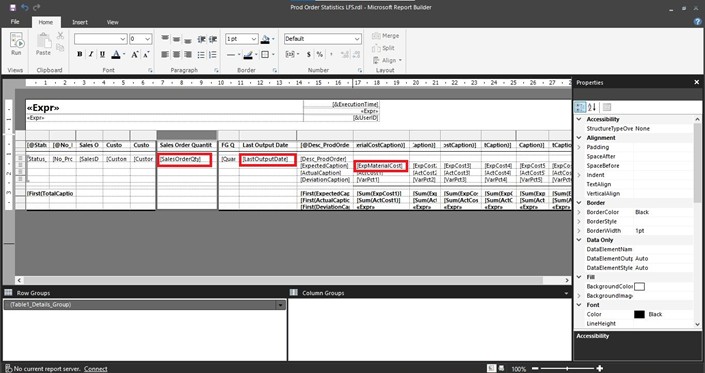
Step 3: Importing the Standard Layout
The customized layout, Prod Order Statistics LFS.rdl, is currently blank, we need to populate it by exporting the standard layout:
Export the standard layout from Business Central.
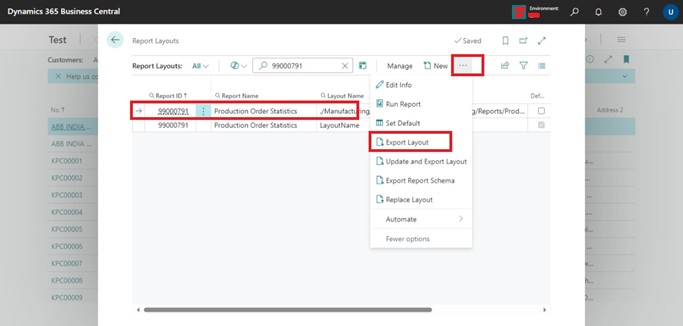 Save the exported layout as Prod Order Statistics LFS.rdl in your project folder (where the initial layout was generated).
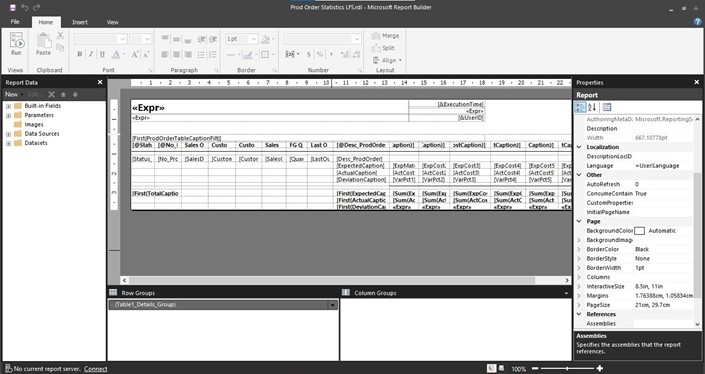
 By doing this, our customized layout will now mirror the standard layout, providing a foundation for our modifications. After saving the file if we check our layout rdl file in VS Code.
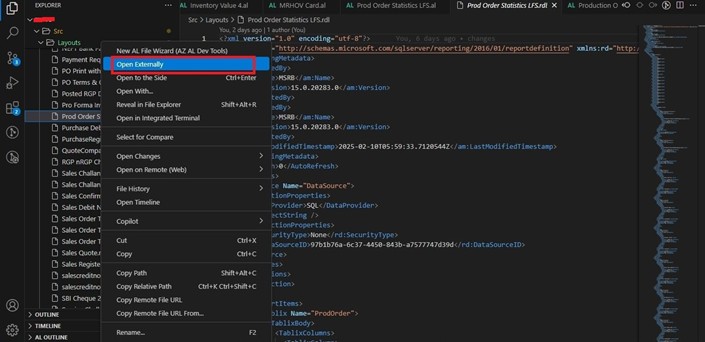 The rdl file we open will look exactly same as standard layout where we will do our changes.
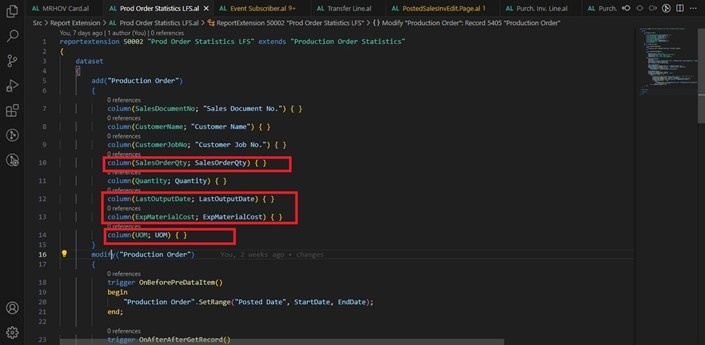
Step 4: Adding New Fields to the Dataset
With the customized layout in place, we can now add new fields and logic.
In Visual Studio Code (VS Code), we add columns for fields we need inside the dataset using the add method. After writing the code, build the package (Ctrl + Shift + B) to reflect these changes in the layout.
Here is a sample syntax for adding a Column:
add('DataItem Name')
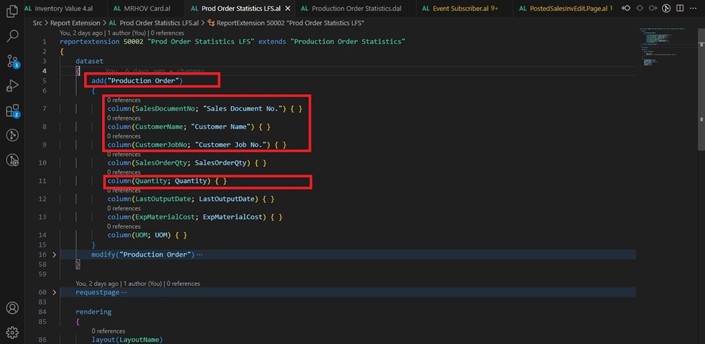
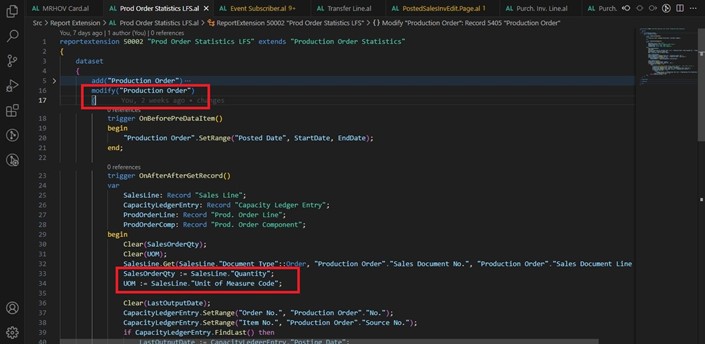
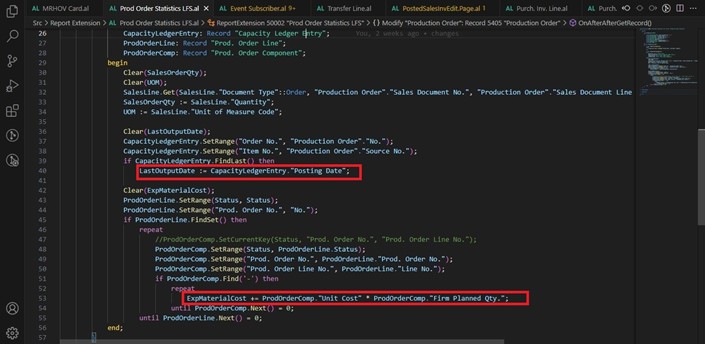
 You can write code within the OnAfterGetRecord trigger of the DataItem. To do this, use the modify method and insert your logic inside the OnAfterAfterGetRecord trigger. Store values in variables and add those variables as columns in the layout.
modify(‘DataItem Name’)
Step 5: Enhancing the Request Page
We can also add fields to the Request Page to allow user input for filtering.
Use the addlast(Content) or addfirst(Content) method to create groups and include fields. In our case, we add StartDate and EndDate fields.
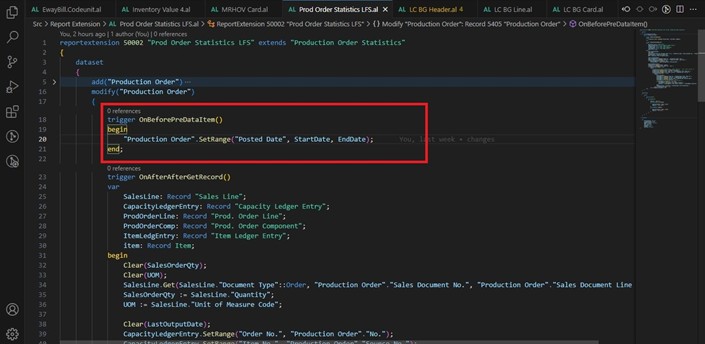
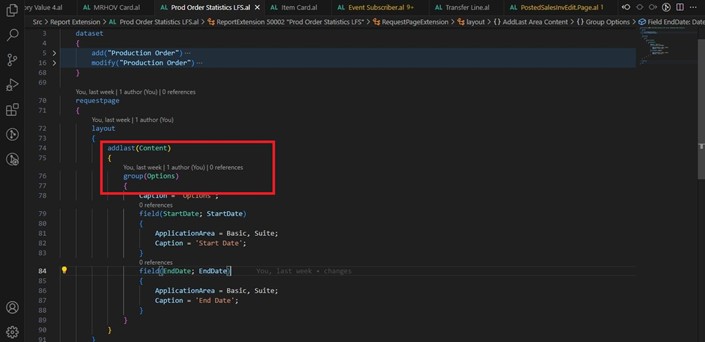 To filter the DataItem using the request page fields, write the filtering logic within the OnBeforePreDataItem trigger inside the modify. This ensures the report retrieves data according to the specified date range.
 Step 6: Testing the Customized Report
Finally, we test the updated report:
In Business Central, search for the Production Order Statistics report.
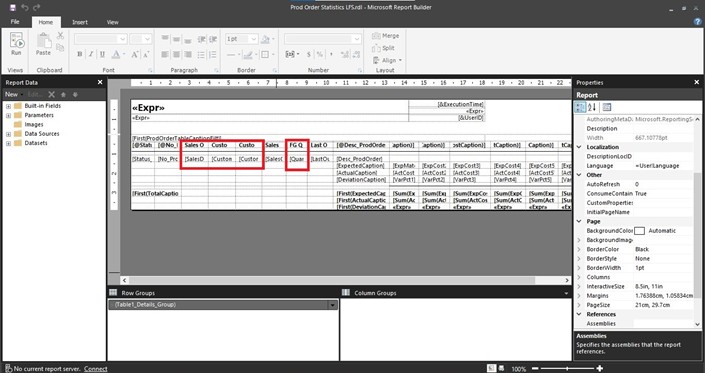
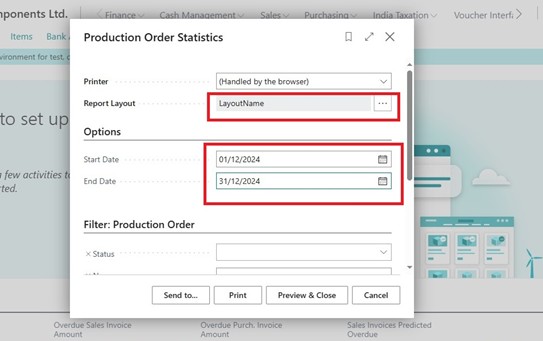
In request page, we can see Report Layout is getting our custom layout because we have selected this layout as default above, also Start Date and End Date is also gets added in Request Page.
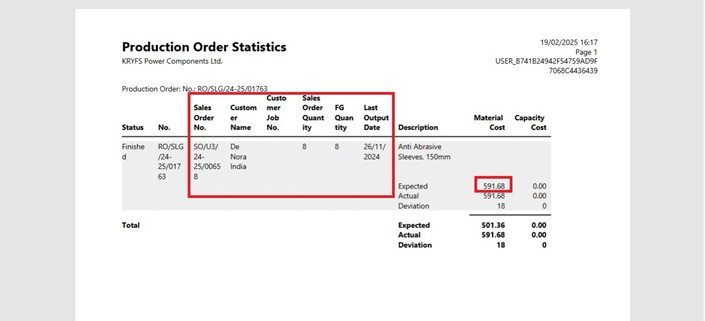
Generated report will have our custom values in report.
 This process allows you to add new fields, adjust data retrieval logic, and personalize request pages while maintaining the integrity of the base application.
Happy coding!