The agenda includes an overview of allocation accounts, which are designed to allocate revenue and costs to multiple general ledger (GL) accounts. Here we will discuss fixed and variable account types, the purpose of allocation accounts, and how amounts can be split based on quantity or value.
The primary function of allocation accounts is to distribute amounts on sales and purchase documents, as well as general journals. This feature is integrated throughout the system, applicable to various transactions such as purchase orders, sales invoices, and general journals.
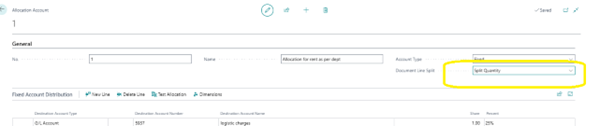
In below scenarios we had taken Document line split as split amount and account type as fixed in Allocation account setup
When we choose Account type as fixed then the Percent field on the line is fixed.
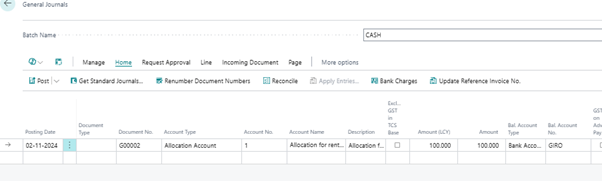
Let’s have an example involving a rent transaction through General Journals
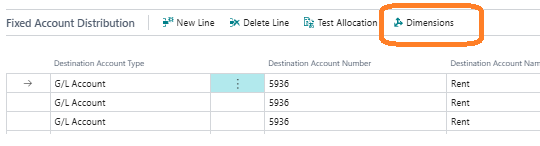
Here we can see how to allocate a rent payment of 100 Rs across three departments: administration, sales, and production. The allocation is based on the number of employees in each department, illustrating the logical distribution of costs.
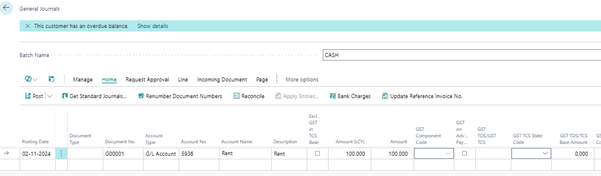
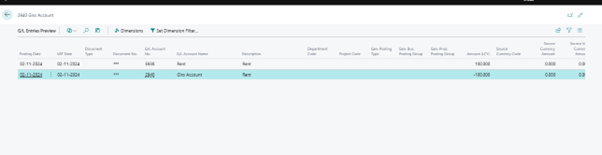
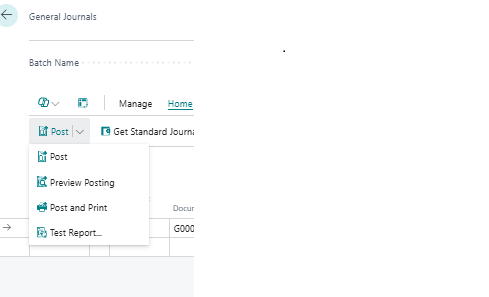
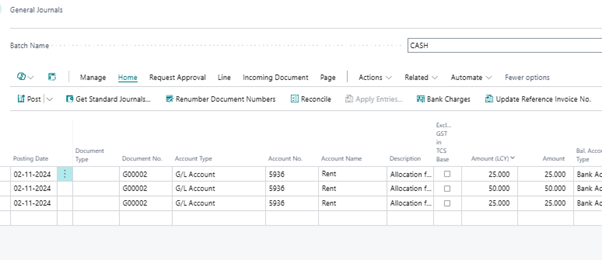
When we do Preview posting for it to see its financial entries, we can see that rent is only having only line, it is not distributed for departments wise.
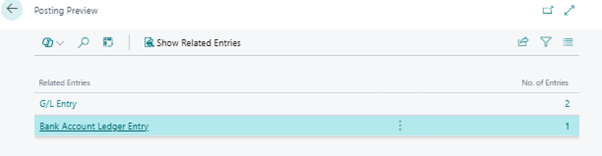
As we can see that only one line is created for rent, as below
We can go with the use of dimensions to categorize expenses by department. Instead of manually entering multiple lines for each department, users can set up allocation accounts to automate this process, reducing manual errors and improving efficiency.
The setup process includes specifying the account type and the distribution method, whether by amount or quantity
To set up an allocation account.
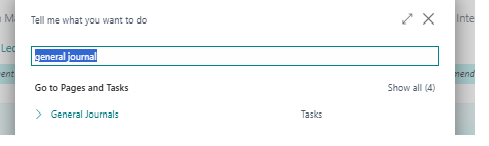
Search-Allocation Accounts in Business central
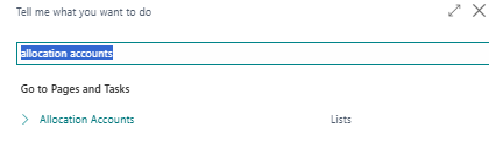
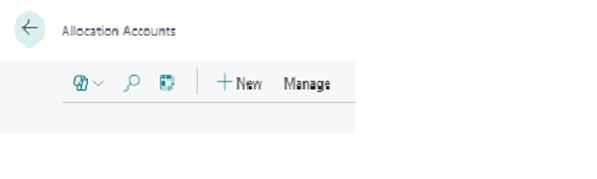
Click on respective Link and create New
When we click on new, New window opens where we need to fill the respective details. Here we define the distribution of Amounts and Percentage for each department.
When we choose Account type as fixed then the Percent field on the line is fixed.
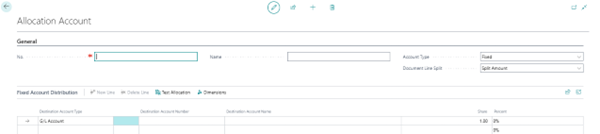
Here we define the G/L account and its percentage shar according to the department which is required. For easy understanding we have taken the Account type as “FIXED”nin the Header.
Also taken “Split amount “ in the Document Line Split in the Header.
In the Allocation Account line part, there is a field named as “Share” which is used to define the distribution.
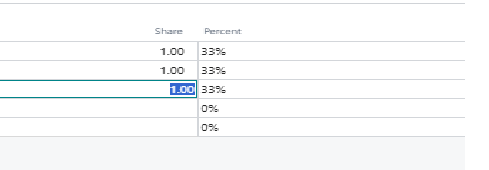
Where we can enter values as per requirement, like if user want to enter in Percentage he can enter there as !0%, 20 % etc. Or, he can also insert the ratio like 1:1:1 for three lines which means amount will be distributed in 33% share for each line,

Or, if he want that the value to be distributed in 1:2:1 he can enter the value as 25% in first line, 50% in second line, and 25% in third line.

Else he can insert value as 1:2:1 respectively in three line.

The Share column is on the Line part
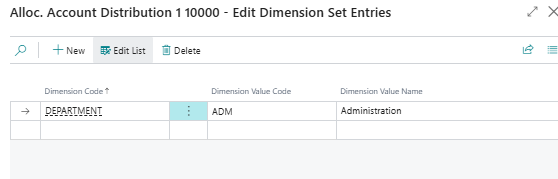
Now if we want that the three lines are for three different departments then we can assign value in the Dimension after selecting the line.
Set up the dimensions for each department
After selecting line Go to dimension
Then select the dimensions and its value
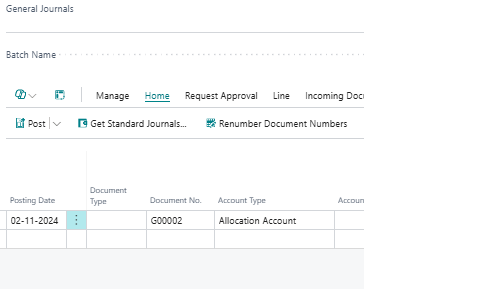
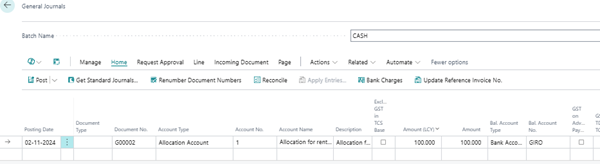
Now to check its impact we again go to General Journals
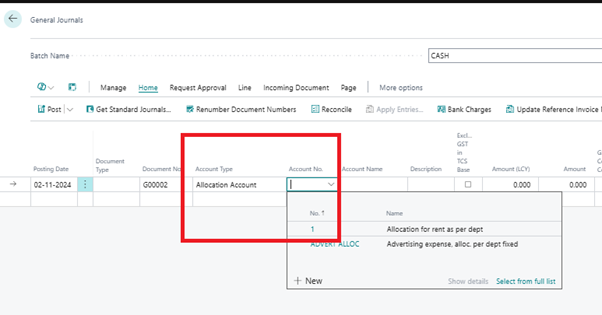
Here we can see that we have an Option to select “Allocation Account “ in Account type on the General Journal line,
Here we select Allocation Account and then its value i,e. 1. Which we had created
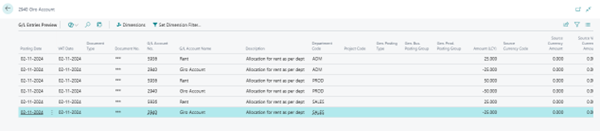
Here we can fill other details and after that when we do “Preview Posting” we can see that the now there are 6 different lines created
On doing Preview posting

When we click to view the 6 Lines, we can see that whichever accounts we selected on the setup is coming here along with the distribution which we defined on the setup.
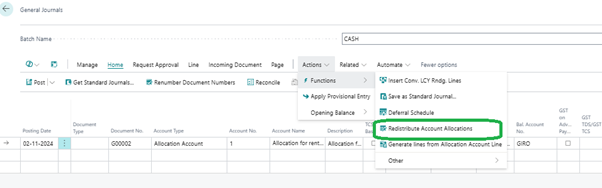
There are some additional features of allocation accounts, such as the ability to redistribute account allocations, users can modify the allocation percentages or GL accounts without altering the original setup, allowing for flexibility in transactions.
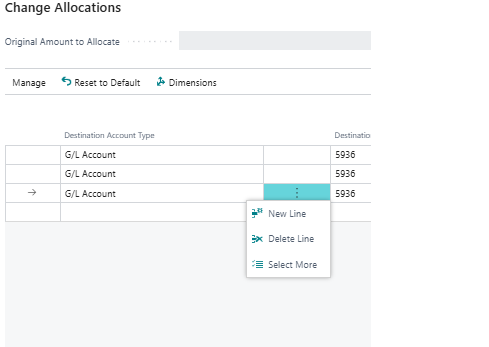
For that we select the line, and then go to
Action-functions-Redistribute account allocations
When we click on it a new window opens, showing the details of the setup.

On this page user can change any required information like he can add new line or delete any one as per requirements without impacting the original setup.
There is an action on the page “Reset to Default” which is used to reset the original setup. If user accidently modifies some details but want to undo it.
Let’s do a change
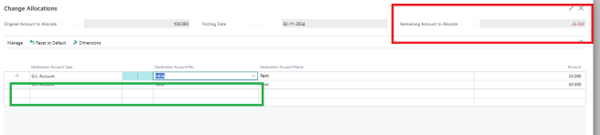
We delete one line on the page
Here we can see that the Remaining amount to allocate value is modified as we had deleted the line.
Now if we want to undo it we can simply click on the “Reset to Default” action on the header of the page.
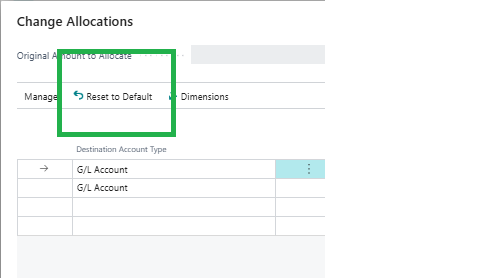
After click on this action the deleted line comes again

If we delete one line on the page and then distribute its value on the remaining lines .After saving changes, in the previews the setup, to be noted that only four General Ledgers (GLs) are visible. The setup can be modified without affecting the transaction level.
Another feature is the option to generate lines from the allocation account line.
Go to Actions--à Functions-----àGenerate Lines from the allocation account line
This feature is useful if user want to add additional information to existing lines, particularly in the comment section, by using this feature the lines in the setup come on the general Journal line .
On the above we can view that only one line is there, now let’s use the feature
We can see that now three lines are coming where user can add additional information like dimension, comments etc as per requirements.
It is to be noted that after posting, three GLs will be visible in the backend, and the allocation account will show the same results this feature has ability to generate lines on the GLs and post them through the same channels, indicating this as a beneficial feature.
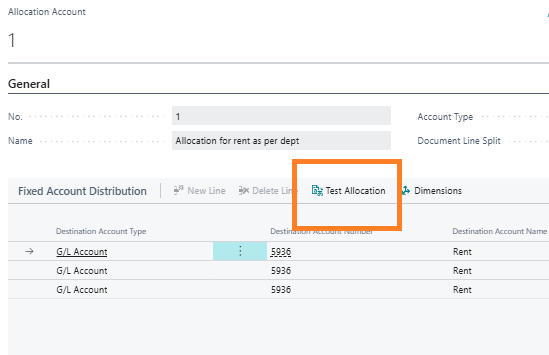
If user want to test the allocation on the setup page itself he can do same.
For this we go to “Allocation account” and then click on the “Test allocation”. A new window opens showing the distribution.
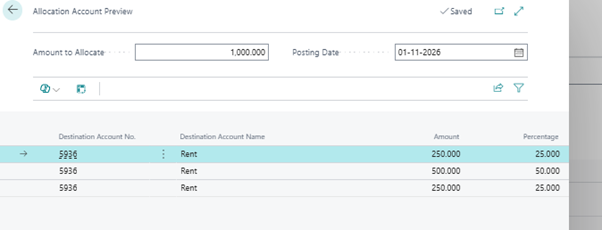
New window
Here we can see the amount to allocate is 1000 which is taken by system randomly on the line part we can see that the amount is distributed according to the setup we had done.
We can also do same setup for multiple G/L for that we have to select different G/L in the setup(Allocation account) page it will work same as above only change is that in previous one we had same G/L (rent) with different dimension but here different G/L.
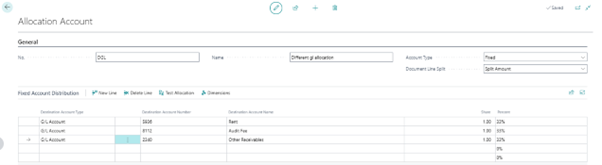
GL and bank accounts can be distributed accordingly as per requirement. Means we can use G/l Or Bank accounts as per requirement at the setup page as per requirement.
There is another scenario that if user want that he need to select the G/L on the General journal lines, which should be distributed as per setup done. But he can select any G/L on the line. In that case we can use “Inherit from Parent” on the “Allocation Account” Page as below, we will not select any G/L on the line and only assign dimension as per requirement.
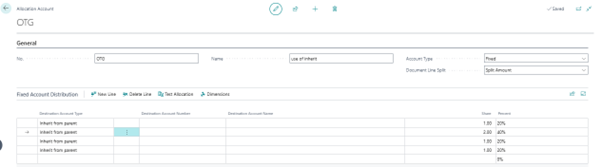
We define the dimension there after selecting the line
Now, we go to General Journal, here we need to make a note that now we don’t use allocation account in the account type field on the line, as we are using the Inherit from parent functionality
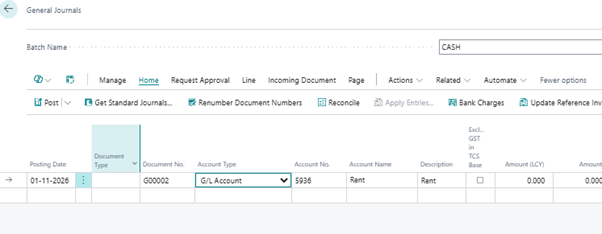
After filling all the details on the line user had to select the value in the “Allocation Account NO.” field on the line
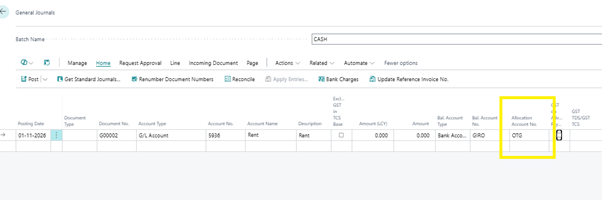
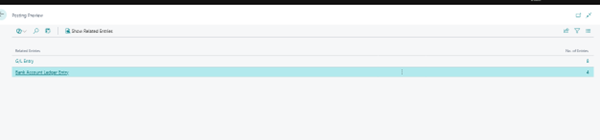
Here we had selected the line now on Preview Posting we can see effects
The concept of inheriting from the parent account, explaining that the selected GL in the transaction will be used as the parent GL. Here we proceed to distribute amounts and specify departments for allocation, demonstrating the setup process.
Here we do not want to select the allocation account and instead choose a normal GL. Herer we see the importance of selecting the parent on the fly (G/L) and how this affects the posting process.
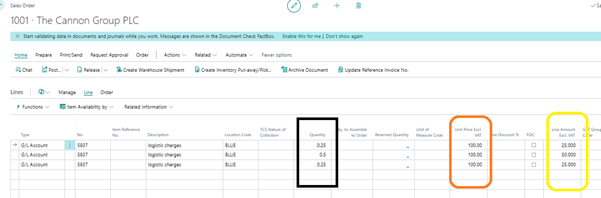
Now we select the Document line split as split Quantity
Sometimes we want to distribute the value as per the quantity on the line instead of the amount. For that we select “Split Quantity” in the document line split field on the header of the Allocation account.
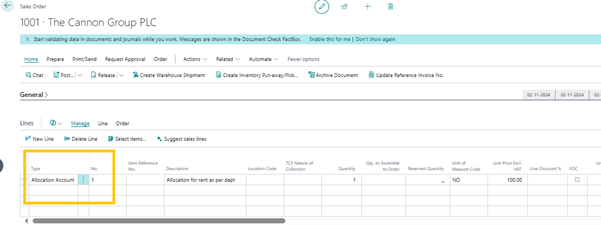
Now we are going to see its effects for that we can go to sales order as we know that this functionality available throughout the system
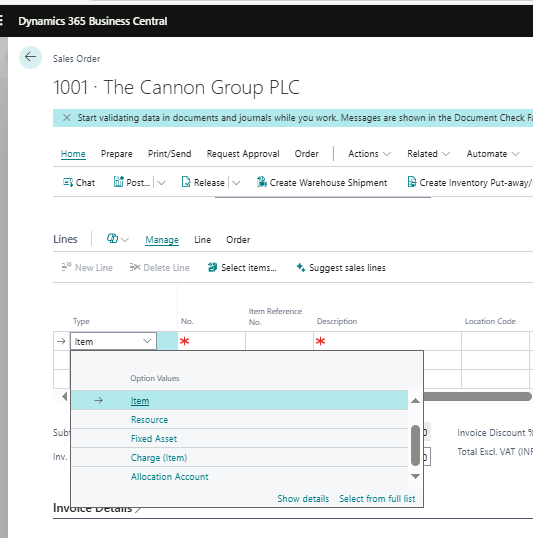
On the line we will select the “Allocation account” and its respective number
Now we go to Line --à Related information---àgenerate lines from allocation account line
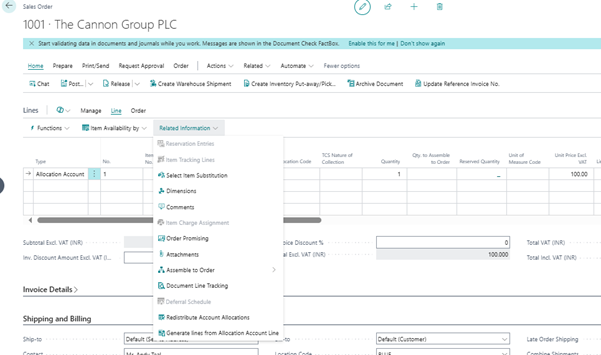
For clarity must note that we had taken Quantity as 1 on the line and amount as 100. Now when we click on the “Generate lines from Allocation account” we can see that depending on setup multiple lines came but the quantity is divided instead of the Amount
In next blog we will learn about Account type : Variable in allocation account Header.